
The Soccer Drills That Actually Transfer to Match Day (And the Ones That Don't)
Every coach has run a small-sided game that looked brilliant on the training pitch and then completely vanished from the team's game on Saturday. Players moved well, the rondo shape was crisp, the finishing was sharp — and none of it showed up 48 hours later against a real opponent. That gap is one of the most frustrating things in coaching, and it's rarely down to the players not trying. It's usually down to the game itself.
Most small-sided games fail to transfer for one of three reasons. They don't force a real decision — players are just moving a ball around a shape with no consequence attached. They don't include real pressure and unpredictable opponents — a defender who's told to hold back isn't behaving like a defender in a match. Or they lose the spatial logic of the actual game — width, depth, identifiable roles — until it becomes an abstract pattern that has nothing to map back to when the whistle blows for real. If you want the underlying framework for avoiding all three traps from scratch, here's how to build a soccer drill from scratch.
Fix those three things, and a small soccer drill stops being a nice training exercise and starts being a rehearsal for the exact moments your team will face in a match. Here are two that do it well.
Game 1: The Golden Zone Game (4v4+2)
Setup
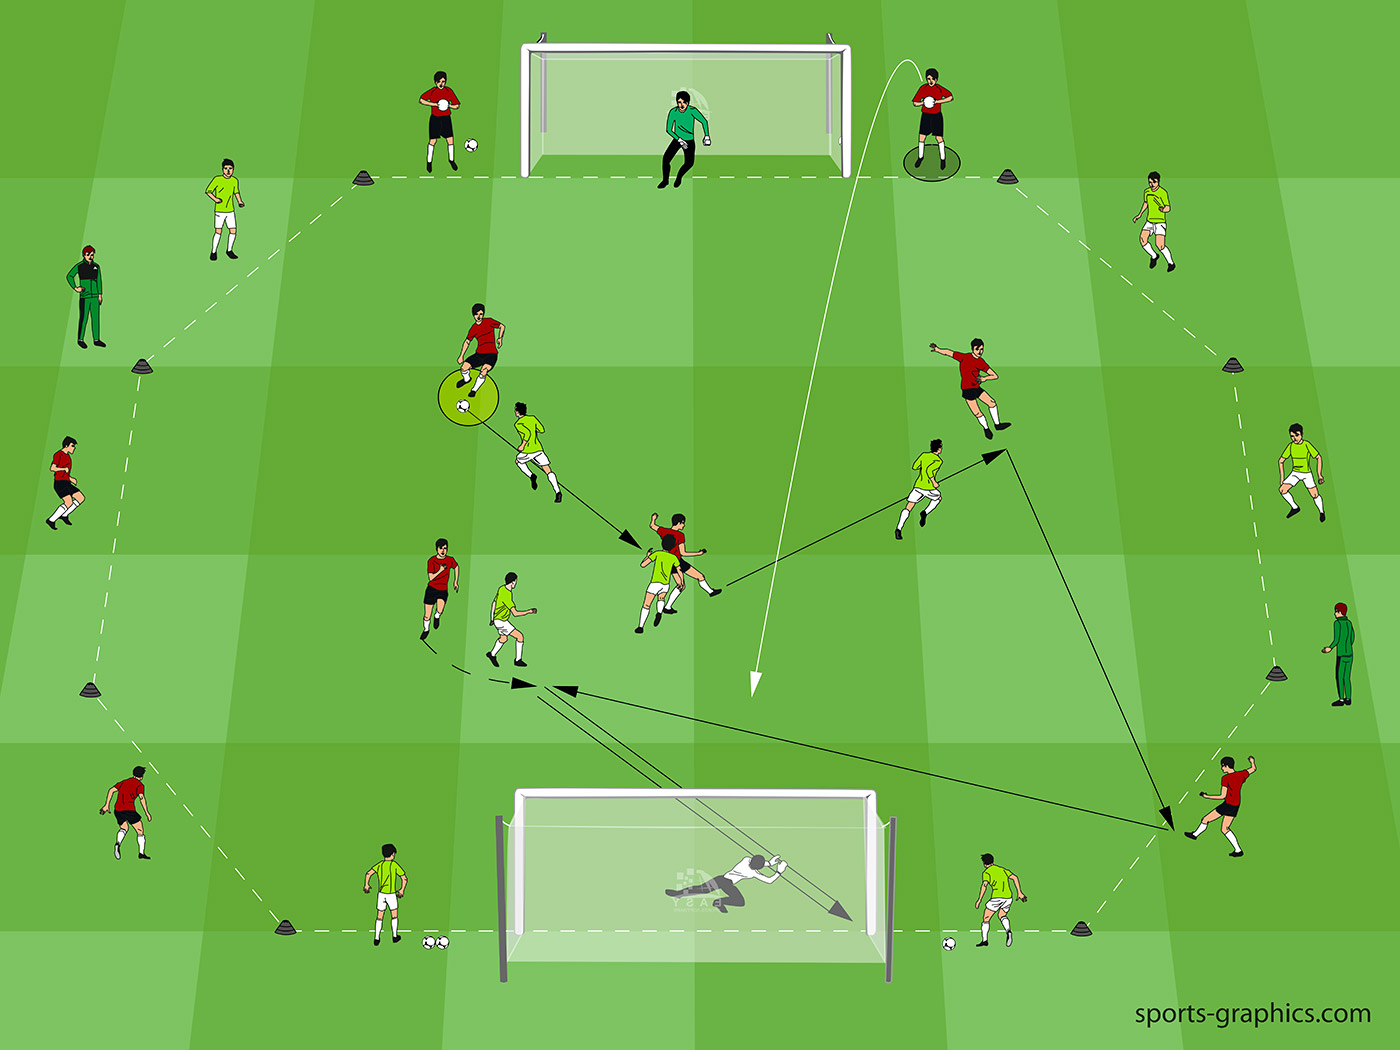
Play 4v4 in a marked area with a clear attacking direction and goals at each end. Add two neutral "bumpers" per team, positioned high in their attacking half and restricted to one touch. Either team can use their own bumper for combination play when attacking that end.
How it plays
It runs as a normal 4v4 possession game toward goal — until someone scores. Instead of resetting, the scoring team's attacking bumper immediately throws a second ball back into play. The phase keeps going, with both teams still scrambled from the goal that just happened.
What to coach
The bumpers naturally recreate the kind of wide, cut-back delivery teams face constantly in real matches, so use this to coach arrival timing into the scoring area — the "golden zone" just in front of goal. Players who sprint into that space too early get picked off; the ones who time their run to the moment the ball is actually available are the ones who score. This is also where you coach defending the cutback specifically, since that's the exact picture the bumpers create. And because the second ball arrives without warning, it forces both teams to react to a live, slightly chaotic moment instead of a clean restart — which is a much closer match to what actually happens after a goal or a scrambled throw-in.
Run it in 90-second bursts, then rotate teams and bumpers so everyone gets both roles.
Game 2: Break and Counter (4v3+1)
Setup
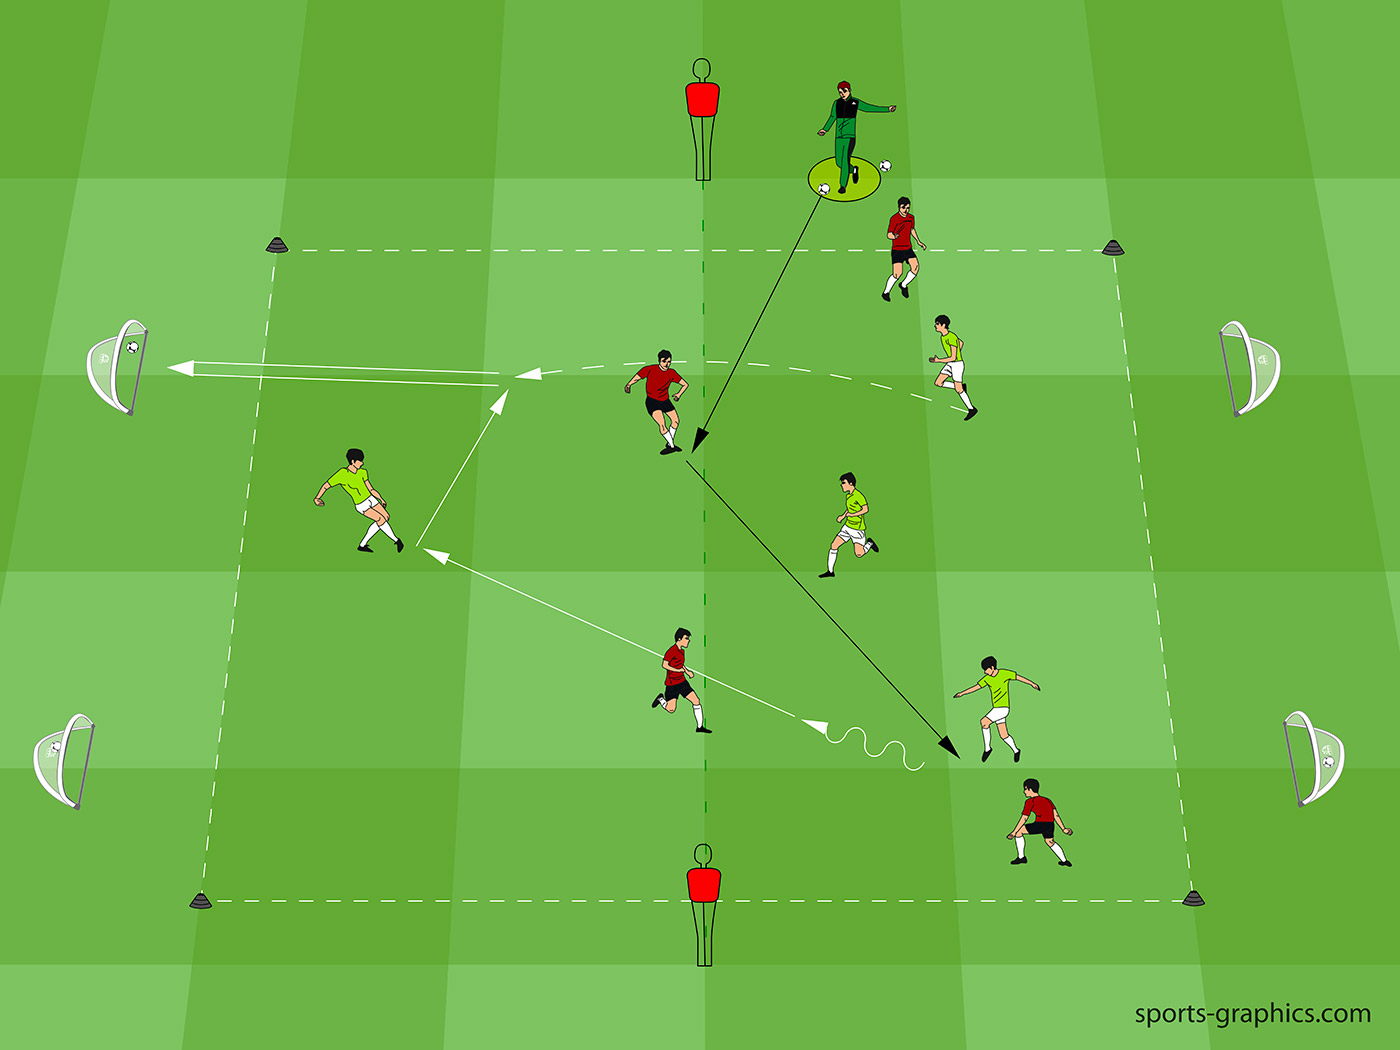
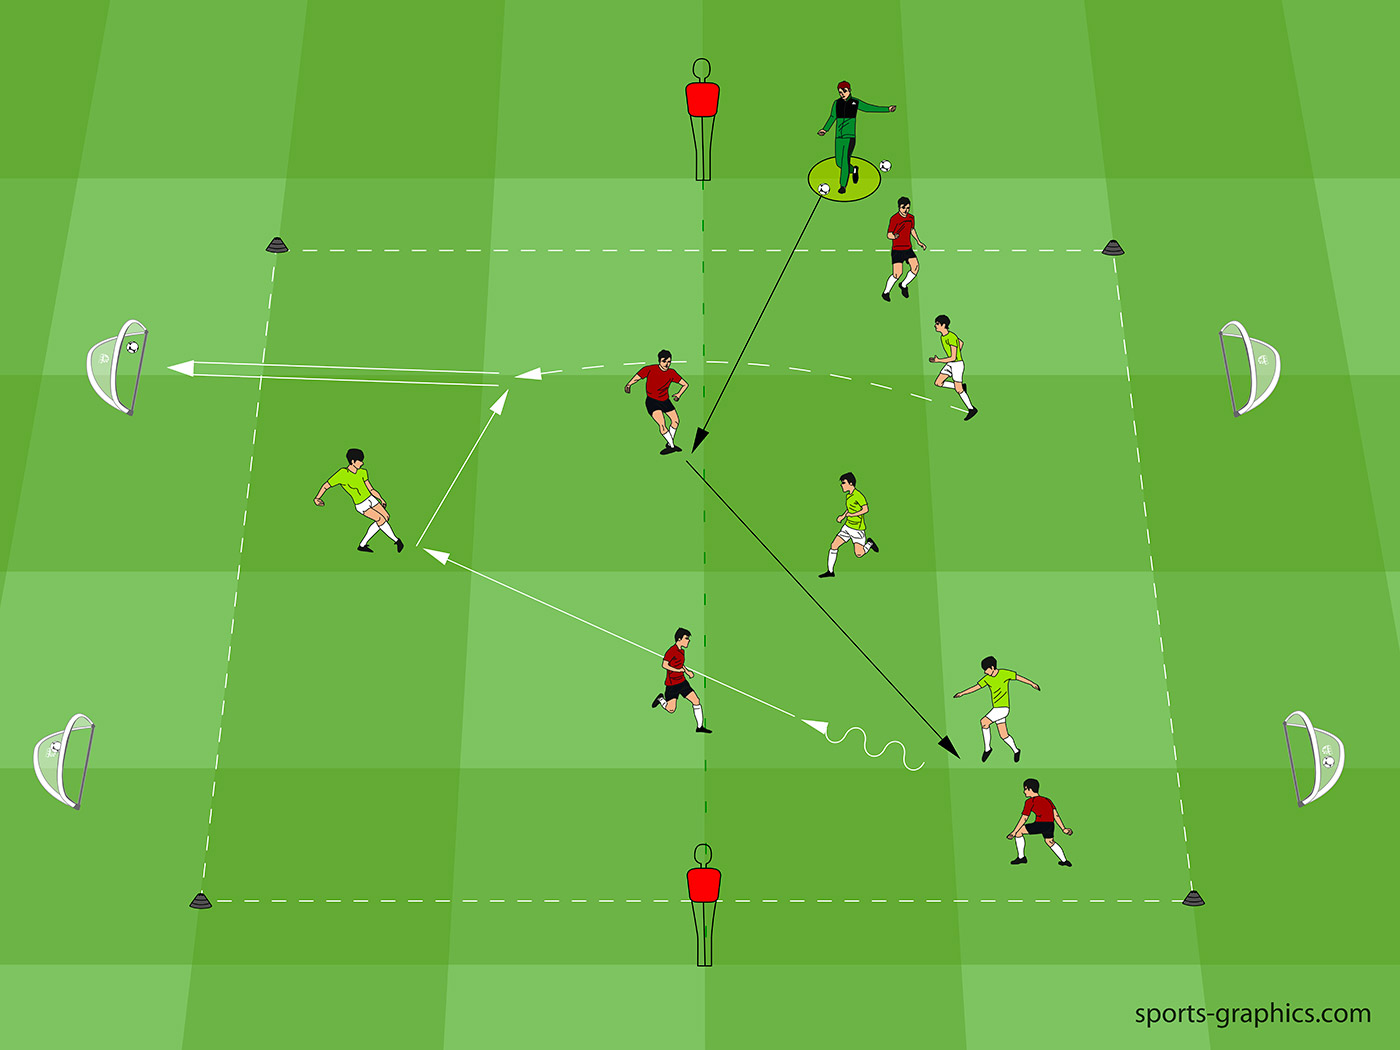
Two attackers start on the halfway line. Two more attackers and two defenders are already positioned in the attacking half, with two mini goals to aim at. A third defender waits in the opposite half. The coach starts the phase with a pass into the central attacking player.
How it plays
The attacking team now has a 4v3 to break down against mini goals. If the three defenders win the ball, they don't just reset — they immediately counter-attack in the opposite direction, where the waiting defender is already reading the moment and stepping in to support the break.
What to coach
On the defending side, the coaching focus is patience and shape: the three defenders need to protect the central passing lanes and block the ball from splitting them before they commit to pressing it — chase the ball too early here and the 4v3 punishes it instantly. The waiting fourth defender is doing something subtler and just as important: reading the moment possession is about to turn over and getting their body shape ready to support the counter before it even happens, rather than reacting after the fact. For the attacking side, the lesson is just as real — breaking lines means accepting some risk, and losing the ball here has an immediate, painful consequence in the other direction, exactly like conceding a transition goal in an actual match.
Why These Two Actually Hold Up
Neither game is complicated to set up, and that's part of the point. What makes them work is that both preserve a clear direction and objective (score, don't just keep the ball), both keep the roles and spacing recognizable as an actual match situation rather than an abstract shape, and both create pressure-filled decisions again and again in a short window instead of once every few minutes.
That said, the game alone won't do all the work for you. The transfer happens faster when you occasionally freeze play at the right moment, point out the spacing or the option a player missed, and say out loud what match situation this actually is. A quick "that's the exact picture you'll see after a corner gets cleared" does more for a player's recognition than ten more repetitions in silence. One well-designed small-sided game that you coach properly beats five generic ones running on autopilot.
Try One in Your Next Session
Pick whichever gap shows up most in your own matches — struggling to defend cutbacks, or getting caught out on the counter after losing possession in numbers — and run the matching game this week. Pair it with the pressing games or the passing warm-up if reaction speed and quick decisions are already a theme in your sessions; they build on each other naturally.
If you try either of these, let us know how your players responded — and share it with a coach who's still wondering why nothing from training shows up on match day.